Showing posts with label The Toy Box. Show all posts

Friday, August 5, 2016

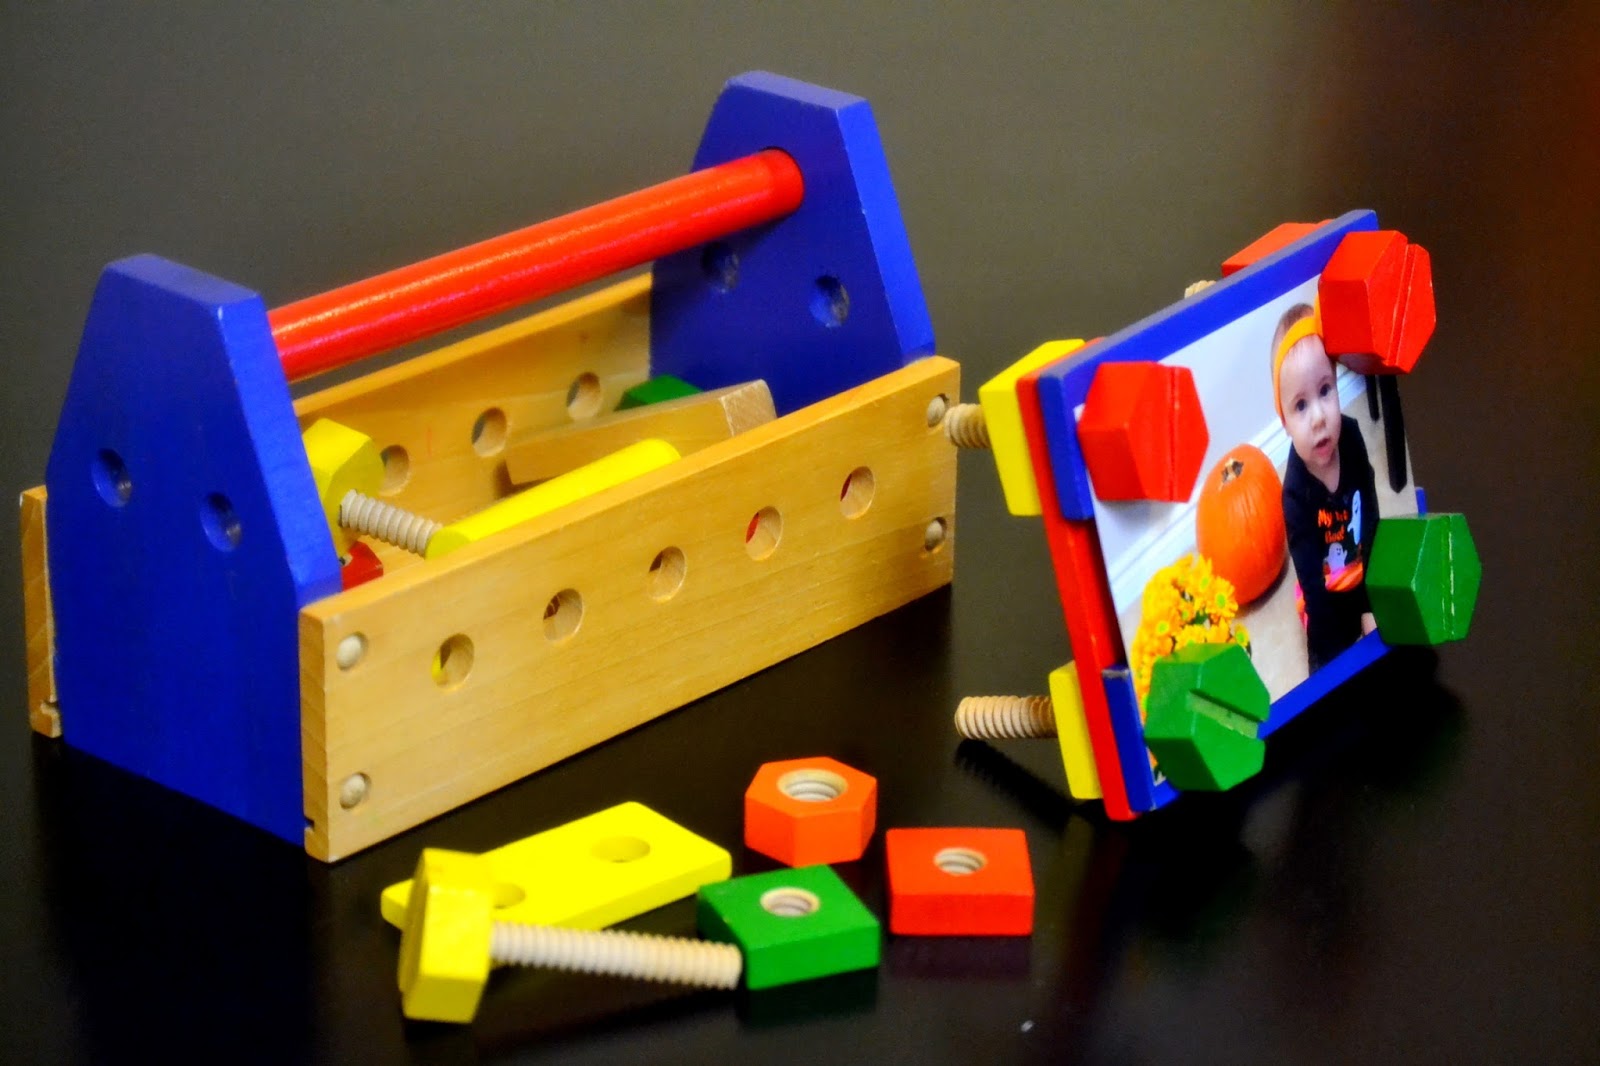
Repurpose a Toy Wooden Tool Kit into a Picture Frame


My goal is to repurpose everything and I found that toys are one of the easiest to up-cycle creatively. Take, for example, this toy wooden tool kit that everyone has lying around. It might miss some of its pieces but you could still turn it into a nice picture frame and a nice memento for your child. This could also be a good project for a preschooler.


All is needed for this project: a 4x6 picture and a pair of scissors.


Punch 1/2 inch holes in the four corners of the picture. I made sure the hole match the hole from the wood pieces I was going to use.


Assemble the frame using two wooden bolts from the toy tool kit.


Wednesday, January 29, 2014

10 Minute Ballerina Tutu


My daughter loves everything blue and ballerinas. I wanted to combine the two of them and it had to be something that did not take a long time to make. I made a very cute blue ballerina tutu in just 10 minutes!

I got two yards of blue tulle that I cut into 4-5 inches wide strips.


I took a pink headband elastic I had leftover from another project and I measured it to fit my daughter. I folded each strip of fabric in two (lengthwise).

I slipped each folded strip through every whole in the elastic band


 and I made a tie knot


Tuesday, January 21, 2014

Make a Hopscotch Inside


On a long winter day it gets a little boring to stay inside.
With some utility tape and some sticky foam sheets I made a hopscotch for my toddler.

She was very enthusiastic to help me cut out the numbers and stick them on the carpet.

She played for an hour! Counting and jumping, jumping and counting.
Besides giving us something to do, the hopscotch also became an education tool for learning the numbers.


Saturday, November 23, 2013

Crochet a Toy Basket


This is a very simple basket crocheted in the half double crochet stitch. It is basically crocheted just like a hat (a very big hat). I used a smaller hook to make the basket more stiff.

I started with ten loops and I increased every row until I had 120 loops. 
First row I increased for every loop, second row I increased every other loop, third row I increased every third loop, and so on until I had the desired size. 


The next step is only going round and round in a circle crocheting the half double crochet stitch.


When I had the desired size, I made two handles and the basket was ready to fill with toys.


Sunday, September 29, 2013

The Toy Box

This is a great idea to entertain curious toddlers. 


Gather all kind of interesting objects from the miscellaneous drawer (deemed to be safe for toddlers, of course) and put them in a small plastic drawer box.
 
 
It makes wonders for a toddler!


Repurpose Stuffed Toys into a Draft Stopper


My daughter's old baby stuffed toys are no longer favourites. I still want to keep them around as keepsakes. I noticed that the playroom's door was quite drafty so I decided to repurpose the stuffed toys into a draft stopper.

This is a very easy and super fast DYI project.

1. Gather stuffed toys that are no longer favourites.


2. Charge the glue gun and start putting them together. (I guess sawing them quickly by hand would also work.)


3. Place the new draft stopper in to prevent the cold draft from coming in.


I would suggest using this draft stopper only on tile so it would slide easily when the door is open and closed.

© 2012-2014 imakeeverythingmyself.blogspot.com All Rights Reserved

Sunday, March 17, 2013

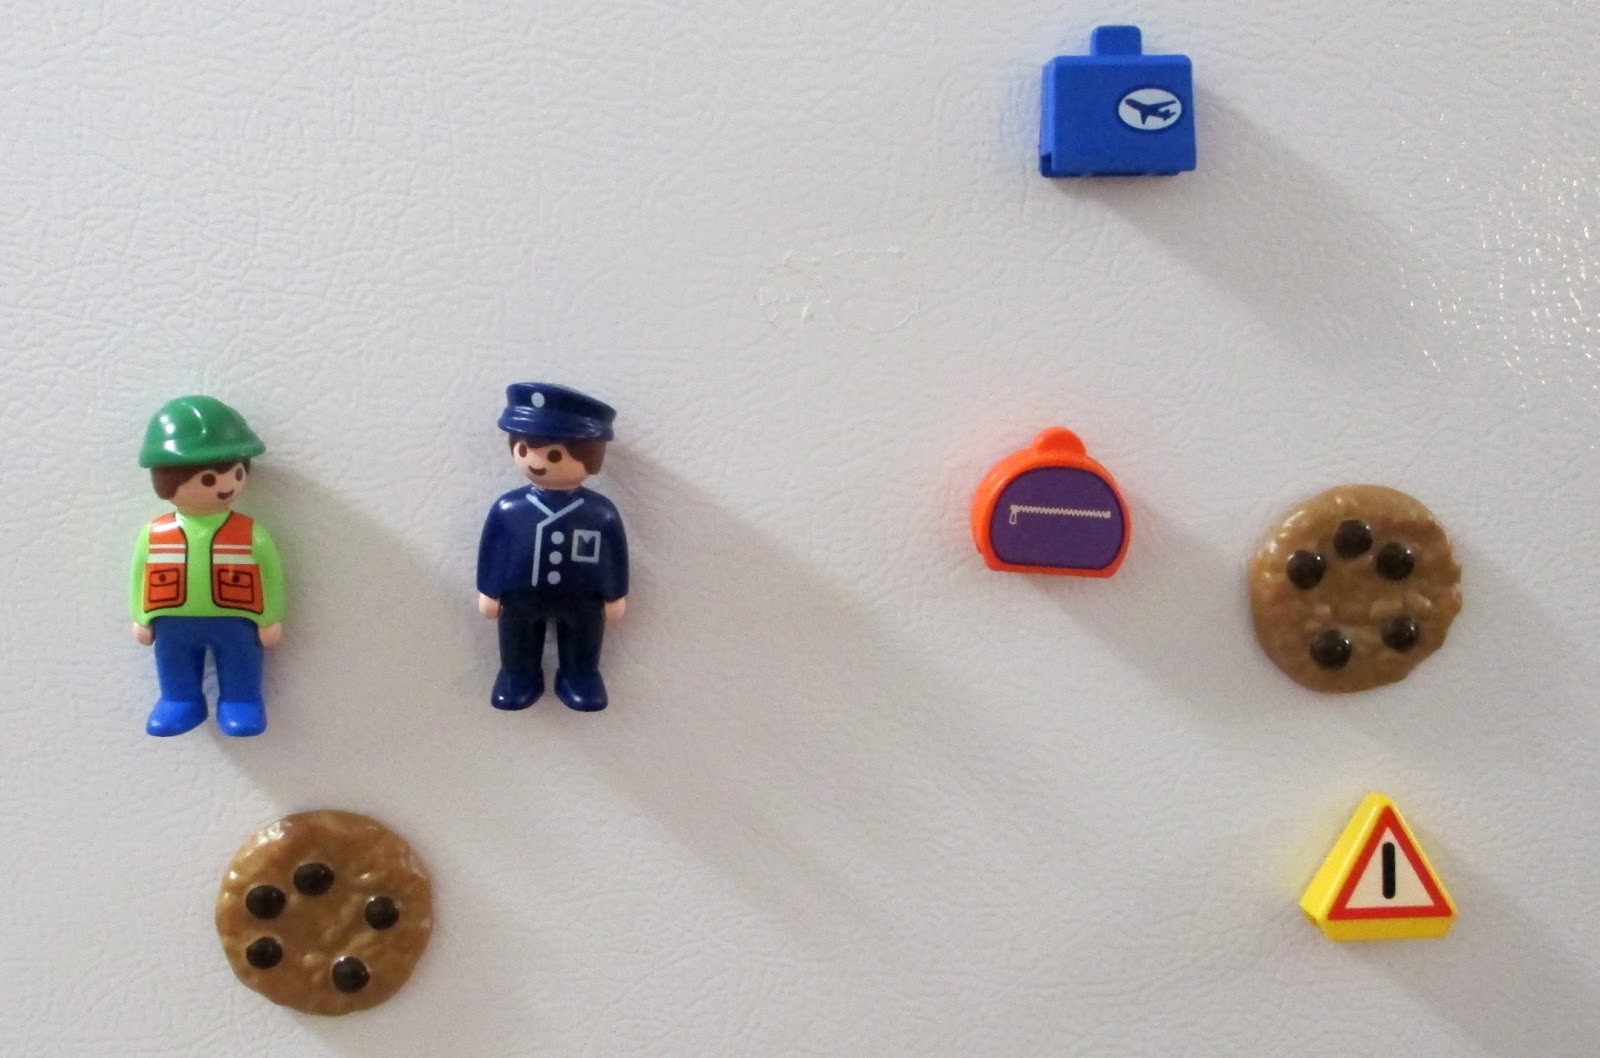
Repurpose Small Toys


Quick repurposing DIY is always fun! It is very rewarding to turn old beloved toys into keepsakes and to recycle at the same time.

Here is an easy and quick solution for old small toys.

1. Find some small toys that haven't been played with in a while.
 

2. Get some inexpensive self adhesive magnetic sheets.
 

3. Cut strips from the magnetic sheets (for better adherence, the strips have to be big enough to cover the back of the toys).
 

4. Use the new magnets to display kids pictures and their art.